If you’ve ever stared at a stagnant garden pond or a small decorative water feature, wondering how to bring it to life with gentle, flowing water, you’re not alone. As a submersible pump supplier, I’ve spent the last 12 years answering this exact question for homeowners, landscape designers, and small business owners—most of whom tell me they’re convinced the process is too complicated, or that they’ll break their new pump on the first try. The truth? Installing a submersible pump for a water feature is manageable for almost anyone with basic tools, a little patience, and a few key facts to guide you. In this post, I’ll walk you through every step, share the mistakes I’ve seen customers make (so you can avoid them), and explain how our pumps are built to make this process smoother than ever. Submersible Pump
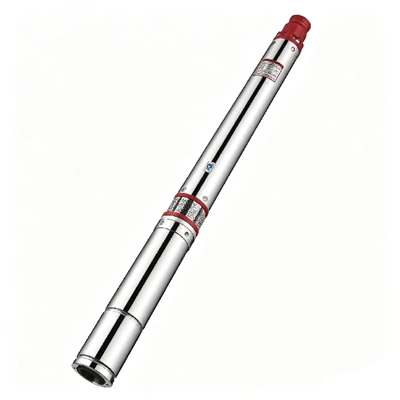
First, let’s start with the basics: what a submersible pump actually does, and why it’s the right choice for your water feature. Unlike external pumps, which sit above ground or at the edge of your feature and push water through long hoses, submersible pumps live completely underwater. That means they’re quieter, they don’t require bulky housing on your patio or deck, and they’re far less likely to leak water into your space. For water features like small ponds, bubbling fountains, or decorative streams, they’re the go-to for good reason. Before you even touch the pump, though, you need to get your water feature ready—and that means choosing the right pump in the first place. I can’t stress this enough: buying the wrong size pump is the most common mistake I see. A pump that’s too weak will leave your water feature looking stagnant; a pump that’s too powerful will waste electricity and can even damage delicate rockwork or liner. To pick the right one, you’ll need two numbers: the total volume of your water feature (length x width x average depth, in feet—multiply that number by 7.5 to get gallons) and the “head height,” which is how high the pump needs to lift water from its lowest point to the top of your fountain, stream, or waterfall. For most small to medium features, a pump that moves 100 to 500 gallons per hour (GPH) will work, but always double-check the manufacturer’s guidelines—our pumps list this information clearly on every product page and packaging, so you never have to guess.
Once you’ve selected the right pump for your feature, it’s time to gather your tools and supplies. You don’t need anything fancy, but having these on hand will make the process go smoothly: your submersible pump, of course; a length of appropriate tubing (we recommend vinyl or PVC tubing, which is durable and easy to work with, and matches the outlet size of your pump—our pumps come with adapter fittings to fit most standard tubing); a utility knife or tubing cutter; silicone sealant (if you’re connecting PVC, which is sturdier for longer runs); a pair of work gloves; a bucket or hose to fill your feature later; and a small, soft brush to clean out debris. Pro tip from a pump supplier who’s learned this the hard way: never use copper tubing for these applications. It’s rigid, hard to bend around rockwork, and can scratch the pump’s inlet or outlet if you’re not careful.
Now, let’s get to the installation steps. Before you do anything else, turn off all power to the area where your water feature is located. Even though submersible pumps are designed to be safe underwater, working near electricity and water is never worth a risk. Start by preparing the pump itself. Our pumps come with a pre-attached power cord, so you don’t have to wire anything, but you will want to check for any small plastic plugs or packing material that might be stuck in the inlet or outlet. That’s another common mistake: if you leave a plug in the inlet, the pump will never push water, and you’ll end up thinking it’s broken. Give the pump a quick rinse with clean water to wash off any dust from manufacturing, and then attach your tubing to the pump’s outlet. Most of our pumps have a twist-lock fitting, so you don’t even need tools for this—just align the tubing end with the outlet, push it on firmly, and twist until it clicks. If you’re using PVC for a longer run, apply a thin layer of silicone sealant to the inside of the fitting and slide the PVC in, then let it dry for the time listed on the sealant package before moving on.
Next, you need to place the pump in your water feature. Where you put it matters a lot for how well it works. The pump should sit on a flat, stable surface at the deepest part of your feature, away from any debris that could get sucked into the inlet (like leaves, pebbles, or aquatic plants). If you’re installing it in a pond, you can use a small plastic pump pad (we sell these as an add-on, but you can also use a flat rock or a piece of PVC pipe cut to size) to keep the pump elevated just a little above the bottom. That prevents sediment from collecting around the inlet, which can clog the pump over time. Never lay the pump directly on soft mud or gravel, because that will block the water flow. Also, make sure the pump is not resting on any sharp rocks that could scratch the casing or damage the impeller (the part that moves water). Once it’s in place, you’ll need to run the tubing from the pump up to your water feature’s outlet—whether that’s a fountain head, a waterfall spillway, or the start of a stream. Leave a little extra slack in the tubing at the bottom, near the pump, so if you need to move the pump for cleaning later, you don’t yank the tubing out or pull the pump loose.
Now, a critical step most people skip: securing the power cord. You can’t just leave the cord hanging over the edge of your feature, because rain, kids, or animals could accidentally yank it, and it’s a safety hazard. The best way to do this is with a cord tensioner or a weighted clip (we supply these with every pump for free, because customers keep asking for them). Tie the cord to a sturdy part of the feature’s edge—like a rock or a wooden deck post—about 12 to 18 inches away from the edge, so there’s no chance of the cord falling into the water. Make sure the strain relief (the plastic part where the cord meets the pump) is not bent sharply, because that can cause the cord to break over time. Double-check that there are no kinks in the tubing either—kinks will restrict water flow, so run your hand along the entire length from pump to outlet to smooth out any twists.
Before you turn the pump on for the first time, let’s test for leaks and make sure everything is connected properly. Fill your water feature with clean water until the pump is completely submerged—our pumps need at least 6 inches of water above the inlet to work, so don’t skimp here. Wait 5 minutes, just to be sure there are no air bubbles trapped inside the pump (air bubbles can make the pump run noisily or not push water at all). Now, go back to the power source. Turn the power on slowly, not all the way at once. If your pump starts and water flows immediately, great! If not, turn the power off right away and check a few things: did you remove the plastic plug from the inlet? Is the tubing kinked? Is the pump completely submerged? Most of the time, the first run failure is something simple like that, not a broken pump. Once it’s flowing, watch it for 10 or 15 minutes to make sure the water level in your feature doesn’t drop too fast (that would mean a leak in the tubing), and that the flow is consistent.
After you’ve tested the pump and everything is working, there’s one final step to keep your pump running for years: regular maintenance. This is something I always emphasize to customers, because a little upkeep prevents most problems. Every 4 to 6 weeks, turn off the power, pull the pump out of the water, and rinse it off with a hose to remove any algae, leaves, or sediment that has collected on the inlet. Unscrew the pump’s cover (most of our pumps have a simple, tool-free design for this) and gently clean the impeller with a soft brush—never use harsh chemicals or a hard brush, because you can damage the impeller. If you live in a cold climate, you’ll need to winterize your pump too: take it out of the water, clean it thoroughly, store it in a cool, dry place, and drain all the water from it to prevent freezing and cracking.
Now, a few common problems I get asked about, and how to fix them, because even with the best installation, small issues pop up. If your pump is running but the flow is weak, check the inlet for clogs, or make sure the head height isn’t higher than the pump’s rated maximum. If it’s making a loud humming noise, that’s usually air in the system—turn it off, let it sit submerged for a few more minutes, and try again. If the pump won’t turn on at all, check the power connection first (make sure the GFCI outlet is working—those are non-negotiable for outdoor use, by the way, and you should always use one).
At the end of the day, installing a submersible pump is a straightforward job, but having the right product and guidance makes all the difference. Our pumps are built with durable, corrosion-resistant casings, easy-to-clean impellers, and safety features that make them perfect for every kind of water feature, from small tabletop fountains to large backyard ponds. If you’re ready to pick the right pump for your project, or if you have questions about sizing, installation, or maintenance, our team is here to help. We work with homeowners, landscape contractors, and business owners to find exactly what they need, no matter the size of their project.

When you’re choosing a submersible pump, don’t cut corners on quality—cheap pumps might seem like a good deal upfront, but they break easily, use more electricity, and require more frequent replacement. Our pumps are designed to last for years, even with regular use, and we stand behind every product we sell. If you run into any issues during installation or maintenance, don’t hesitate to reach out. We don’t just sell pumps—we support our customers every step of the way, because we know that a well-functioning water feature brings so much joy to any space.
FLA Solar Deep Well Pump References
- American Nursery and Landscape Association. (2022). Water Feature Maintenance Guide for Residential Landscapes. ANLA Publications.
- Pentair Water. (2021). Submersible Pump Selection and Installation Handbook. Pentair Technical Documentation.
- International Code Council. (2020). Residential Outdoor Electrical Safety Standards for Water Features. ICC Code Adoption Bulletin.
- The Pond Professor. (2023). Common Submersible Pump Installation Mistakes and Solutions. Independent Landscape Water Feature Research Series.
Longbiao Pump Industry Co., Ltd.
We are one of the most professional submersible pump manufacturers and suppliers in China, featured by quality products and low price. Please rest assured to buy discount submersible pump for sale here from our factory. We also accept customized orders.
Address: Unit 101, Building 11, Pan’ao Entrepreneurship Park, Daxi Town, Wenling City, Taizhou City, Zhejiang Province, P.R. China
E-mail: 1653746797@qq.com
WebSite: https://www.cnlongbiao.com/
