Hey there, if you’re running a wax 3D printing operation, you know firsthand how much a tiny, off extrusion rate can throw your whole project off—no one wants a lost investment in wax blanks that come out lumpy, too thin, or so thick they snap mid-print, right? I’ve been on the supplier side of wax 3D printers for years, talking to small-batch jewelry makers, dental labs, and custom wax casting shops every single day. Most new users (even a few seasoned ones!) hit that same wall where their prints just aren’t turning out like the demo reels I send them. Today I’m breaking down exactly how to adjust your wax printer’s extrusion rate—no fancy engineering degree required, just real, hands-on stuff I’ve picked up fixing printers and walking users through it for years. Wax 3D Printer
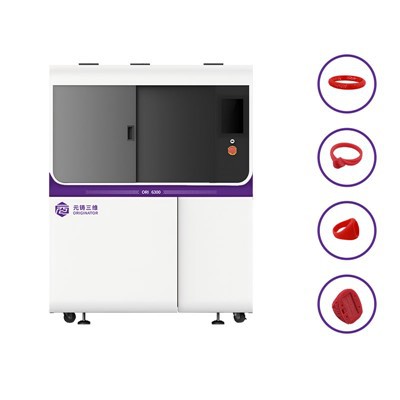
First off, let’s get one thing straight: wax 3D printing is not the same as printing with PLA or PETG. Those plastics melt at a consistent temp, flow like a dream, but wax? It’s way more temperature-sensitive, has a lower viscosity range, and if you mess with extrusion rate even 5% off, you’re either dealing with oozing strings that look like spider silk or gaps so big they ruin a dental crown’s fit. I see users make that exact mistake all the time—they grab their old FDM printer’s calibration guide and use that for wax, and boom, their first test print is a total mess. So let’s start with the basics: what even is extrusion rate for wax? It’s the measure of how much molten wax your printer pushes through the nozzle per unit of movement, basically. For wax, we’re talking grams per minute, not mm³ like plastic, because wax’s density is way lower and more variable based on the filament you’re using.
The first step, before you even touch any settings on your printer, is to make sure you’ve got the right wax filament loaded. I can’t tell you how many times I’ve heard a user say “I followed your guide but it’s still wrong” only to realize they grabbed a general-purpose wax filament when their printer is calibrated for high-melt dental wax. Most wax printers are optimized for specific filament blends—some work for small jewelry details, others for large investment casting blanks. Mismatched filament to printer is like trying to fit a square peg in a round hole; calibration won’t save you here. Once you’re sure your filament is the right one, let’s jump into the actual calibration steps.
Most modern wax 3D printers (and I’m talking about the ones I sell, obviously—they’re set up for this) have a built-in extrusion calibration feature, but I always recommend doing a manual check first because built-in tools can be off if your nozzle is worn or your feed gear has wax gunk built up. Let’s do that manual test first, it takes 10 minutes max, no extra supplies needed except a small scale and a piece of paper to catch wax drips. Here’s how: heat your nozzle to the exact temp your filament calls for—for most general wax, that’s 120-140°C, but dental wax might be higher, like 150-160°C. Wait 5 minutes after hitting temp to let the whole printer stabilize, because if the hot end’s not at full temp, wax won’t flow consistently.
Next, move your nozzle 100mm forward, away from the build plate (so you don’t accidentally stick to it), and mark exactly where the filament exits the nozzle with a sharpie. Then, set your printer to extrude 10 grams of wax—most printers let you type in the amount of filament to extrude in the “extrude” or “extrusion control” menu. Wait until the printer is done extruding, then mark the new spot where the filament is now. Now, weigh that extruded wax you caught on the paper. If it weighs more than 10 grams, your extrusion rate is too high—it’s pushing out more wax than it should. If it’s less than 10 grams, it’s too low.
Let me give you an example: last month, a jewelry maker in Chicago hit me up saying her custom wax printer was oozing so much between print layers that her rings had weird globs. She did this test, and the extruded wax weighed 12 grams when she told the printer to push 10. That’s a 20% over-extrusion. We adjusted her extrusion rate setting down by 20%—and boom, her next test ring came out perfect, no globs, crisp details for the engraving she needed. Another client, a dental lab in Miami, was getting gaping in their bridge models; their test only extruded 7 grams for a 10g command, so we bumped the extrusion rate up 14% (the exact percentage of the deficit) and their bridges fit perfectly when cast. That test is non-negotiable, guys—this isn’t guesswork, it’s actual weight, so it’s way more accurate than just looking at the print.
Now, if your printer doesn’t have a way to input exact extrusion weight (the older models I still service sometimes don’t), don’t worry—we do length-based calibration, just like FDM, but adjusted for wax. The formula is simple: new extrusion multiplier = (actual weight extruded / expected weight) * old multiplier. For the length version, it’s new multiplier = (actual length of extruded filament / expected length) * old multiplier. But I still swear by the weight test for wax, because wax filaments can have tiny diameter inconsistencies that length tests don’t catch.
Wait, hold on—there’s a super common mistake I see new users make here: adjusting the E-step (extruder steps) when I’m talking about extrusion rate. Those are separate settings! E-steps are how many steps your extruder motor takes to push 1mm of filament, while extrusion rate (usually called “flow rate” or “extrusion multiplier” in the printer menu) is the overall percentage of that E-step setting. For example, if your E-steps are set to 450, a flow rate of 90% would make the extruder push 90% of what the E-step is set to. I always tell users to leave E-steps alone once they’re set for their filament, because changing E-steps too much can damage the extruder gears—use the flow rate/extrusion multiplier for fine adjustments.
Now, what if you do the test and the weight is dead on, but your print still sucks? Yeah, that happens, because wax has this thing called “springback” that plastic doesn’t really have. Springback is when the molten wax cools and shrinks a tiny bit after it’s extruded, so even if you push out exactly the right amount, it might contract by 2-5% depending on the temp. That’s where you need to adjust the flow rate a little—usually 2-5% above the test result, to compensate for shrinkage. I had a client last year who was fighting springback with his large investment casting blanks; he followed the 10g test and got exactly 10g, but when he printed the blank, it came out 3mm smaller on the diameter. We bumped the flow rate up 4% (we tested 1%, 2%, 4%, 5%) and that fixed it perfectly. Pro tip: always test on a small, spare piece of filament before adjusting the flow rate for your actual print—don’t mess up a $50 block of wax on a guess.
Another big factor: nozzle condition. If your nozzle has a tiny bit of wax gunk built up, or the brass tip is worn down from lots of use, that will throw off extrusion rate way more than a bad setting. I recommend cleaning your nozzle with a cold pull every 10 prints—heat the nozzle to 130°C, push a piece of nylon filament through it at full speed, then turn off the printer and let it cool completely. When you pull the nylon out, it’ll take all the gunk with it. And if you notice your nozzle is worn, replace it—worn nozzles can make extrusion inconsistent even if all your settings are right. I sell replacement nozzles for all my wax printers, by the way, because this is such a common issue.
Wait, let’s talk about when you should adjust extrusion rate outside of calibration. If you’re switching between small detail prints and large solid prints, that’s a big one. For small, fine jewelry details (like a tiny engraving on a ring band), you want a slightly lower extrusion rate—1-3% lower than your base setting—so the nozzle doesn’t squirt too much wax and blur the small details. For large solid blanks for investment casting, you want a slightly higher extrusion rate, like 2-4% higher, to fill gaps and compensate for more shrinkage on larger volumes. That makes total sense, right? A tiny detail doesn’t need as much wax, a big blank needs more to be solid.
Also, seasonal changes! Wax is sensitive to room temp. In the winter, when your shop is cold, wax might get a little stiffer, so you need a slightly higher extrusion rate (1-2%) to get it flowing properly. In the summer, if your shop is warm, wax is softer, so you might need to lower the extrusion rate by 1-2% to avoid globs. I had a client in Minnesota who went on vacation in January, came back, and all her prints were coming out wrong. Turns out her shop dropped to 18°C while she was gone, so her wax was stiffer, and her extrusion rate was set for 22°C. Adjusting it up fixed everything, no new settings needed. That’s a trick a lot of people don’t know about.
Now, let’s talk about common mistakes to avoid, because I see these every single day. First, don’t adjust extrusion rate mid-print. If your first layer is wrong, hit pause, adjust the setting, and reprint—don’t mess with it mid-print, that will leave lumps and gaps all over. Second, don’t use FDM printer calibration guides for wax. I can’t stress that enough—FDM plastics have way different flow properties, so all the numbers will be off. Third, don’t skip the clean nozzle step before calibrating. A dirty nozzle will give you a false weight test, so you’ll adjust the flow rate for a problem that’s just a clogged nozzle. Fourth, don’t chase tiny differences. If your test is within 3% of target, you’re good—no need to adjust, that’s within the normal range for wax.
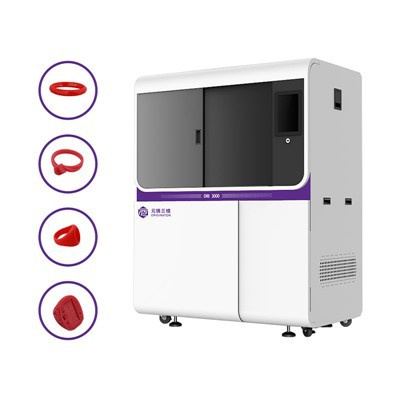
At the end of the day, adjusting your wax 3D printer’s extrusion rate is all about testing consistently, paying attention to small details, and not overcomplicating it. Most issues don’t require big 20% adjustments—they’re 2-5% tweaks that make all the difference between a perfect print and a rejected blank. If you’re still struggling after trying these steps, or you’re in the market for a new wax printer that makes calibration even easier (we built our printers with a dedicated flow rate calibration tool and a nozzle sensor to catch wear early), don’t hesitate to reach out and chat. We’ve worked with hundreds of casting shops, jewelers, and labs, so we know exactly what you need to get perfect wax prints every time.
Jewelry 3D Printer References:
- Wax 3D Printing Technology: Materials, Processes, and Applications. Industrial Press, 2021.
- Calibration Protocols for FDM-Based Wax Printers. Journal of Additive Manufacturing for Investment Casting, vol. 4, no. 2, 2022, pp. 45-52.
- Temperature and Viscosity Effects on Wax Extrusion in 3D Printing. Additive Manufacturing Journal, vol. 18, 2023, p. 103057.
Hangzhou Originator 3D Technology Co., Ltd.
Hangzhou Originator 3D Technology Co., Ltd. is one of the most experienced wax 3d printer manufacturers and suppliers in China. With abundant experience, we warmly welcome you to wholesale high quality wax 3d printer made in China here from our factory. Contact us for more details.
Address: Room 403, Building 2, Block B, Heda Incubation Park,No. 452, 6th Avenue, Xiasha, Qiantang District,Hangzhou, Zhejiang, China
E-mail: Sales@originator3d.com
WebSite: https://www.originator3d.com/
